Candlemaking
Published on midlifexpress.com, 2013.
Candlemaking is an ancient and practical artform. For most of human history we’ve relied on firelight and candleflame for comfort and convenience in the night time hours.
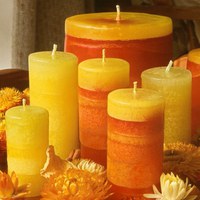
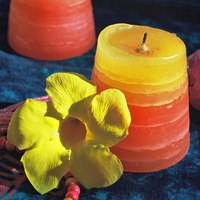
Beautiful candles are easy to make in moulds. Here’s what you need and how to do it.
Materials
Wax: Plain paraffin wax is usually available at craft stores. Alternatives like beeswax and soy wax may be harder to find but can be sourced online.
Wicking: Craft stores usually stock wicking. The thicker the wick the faster the candle will burn down. A rule of thumb: the fatter your candle, the thicker the wick.
Moulds: Anything heat and waterproof will work: milk cartons, yoghurt containers, cardboard cylinders, plastic cups. Use your imagination.
Colouring: Colouring must be wax soluble. It can be bought powdered or concentrated in wax cubes. Water-based food colouring doesn’t work.
Scent: Essential oils can be added (a few drops) to scent your candles.
Utensils: Blu-tack, craft knife, kebab sticks, skewer, heatproof jug, ladle, cooking thermometer, cooking pots (a double boiler or slow cooker are good), cooking oil, newspaper to cover your working area.
Method
1. Set up your mould. Brush the inside lightly with oil to help release the candle when set. Poke a hole in the bottom and thread the wick through. Seal around the hole with blu-tack, and tie the wick onto a kebab stick at the top of the mould to keep it taut. Rest your mould on a level surface.
2. Melt your wax in a pot over low heat. Check regularly with a thermometer to make sure it does not exceed the manufacturer’s recommended temperature for safe heating. Add colouring and scent if you like.
3. Ladle wax into your jug and pour about 5mm deep into the mould. Wait for this to set. It will seal the mould.
4. Fill the mould layer by layer with wax if you want a striped effect, or to the top if you want a solid effect. With layers, allow each to set just enough to pour the next layer in without melting through.
5. After a couple of hours the candle will shrink inside the mould. Pierce a hole near the wick using a kebab stick, and fill this with more wax. You may need to do this two or three times until there are no more air pockets.
6. When the candle is cool (this could take overnight), it should slide fairly easily out of the mould.
7. Trim the candle’s rough edges with a craft knife.
8. If you want a smooth finish, dip the candle into hot wax for a minute or so.
9. Trim the wick. Voila! Your candle awaits!

Safety
Playing with hot wax can cause injuries so be very careful. ALWAYS check the boiling point of your choice of wax with the manufacturer. DO NOT let the wax exceed this temperature as it can catch fire and be explosive. Keep a fire blanket and aerosol extinguisher nearby just in case. NEVER douse a wax fire with water.
Ventilate your working area so you aren’t breathing in fumes.
When lighting your candles it’s a good idea to place them in a saucer to catch drips and for safety. And remember the candle-lover’s mantra: Never leave a burning candle unattended.
